


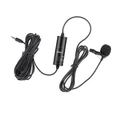

When using a lavalier microphone, in order to improve the effect of the microphone, it is important to pay attention to some usage techniques. Here are five tips for using a lavalier microphone to help you achieve the best sound effect when using a lavalier microphone:
1. Choose the appropriate placement position
The placement of the collar microphone is very particular. If the collar microphone is placed too high, it will make the sound very dull. This is because the collar microphone head will be blocked by the chin when picking up the sound; If placed too low, it will make the sound sound thinner, weaken the dynamic feeling of the sound, and make it sound more difficult. Generally speaking, the optimal placement of the collar microphone is usually located in the middle area of the chest, about 15-18 centimeters away from the speaker's mouth. Of course, each person's voice characteristics and clothing when using the collar microphone are different. To find the optimal placement of the collar microphone, you can start from this area and use normal conversation to conduct sound testing, which can accurately test the reception of the collar microphone and make appropriate adjustments.
The pickup of the collar microphone is relatively sensitive, so a small difference of a few centimeters can also have a significant impact on the pickup effect. Before starting formal recording and shooting, using just a few seconds to adjust and find the optimal placement of the collar clip microphone can effectively help you record clearer and more natural sounds. If there are issues with popping and breathing sounds when using the collar microphone, you can try flipping the microphone head down to avoid recording these unnecessary sounds.
2. Reduce friction noise of the collar clip microphone connection line
The friction noise generated during the use of the collar clip microphone is a very headache problem. If the protection of the connecting wire is not handled properly, we can use many methods and tools to alleviate this problem:
(1) Self made simple "broadcasting buffer ring": Wrap the connecting wire of the collar clip around it and clip it into the clip to create a simple "broadcasting buffer ring". When the connecting wire of the collar clip microphone is slightly pulled or moved, the "buffer ring" can effectively reduce the tension.
(2) Self made simple "tension relief ring": Loosely wrap the collar microphone cable about 5-10 centimeters below the microphone head to create a circular shape. Then, use a small piece of tool tape to loosely fix it to the collar microphone cable, allowing it to move freely within this tape fixing ring. Alternatively, a small piece of string can be used instead of tape, or such a "tension relief ring" can be easily self-made.
(3) Purchase a collar clip microphone management tool: such as a collar clip microphone connection cable holder, which can cleverly fix the cable to the clothes; Alternatively, use rubber connecting wire springs to cushion the pulling force of the wire.
(4) Using adhesive tape to secure the collar microphone: Simply cut two pieces of tool tape and apply them to the speaker's chest and waist to secure the connection line of the collar microphone to their body, avoiding many unnecessary friction noises.
3. Tips for setting the volume of the lavalier microphone
If the microphone volume is too high, the recorded sound effect will also be very poor, so we should try our best to avoid such situations. On a camera or recording pen, we usually see the current audio level status on the words "decibel" or "db", with a display range of -40 decibels (or lower) to 0 decibels. When the wearer of the microphone is speaking with normal voice tone, increase the audio level input of the recording device until the peak of the audio level is consistently maintained at around -10 decibels to -8 decibels; Next, have the collar microphone wearer speak at the highest volume. If the audio level consistently shows a peak of -3 decibels or higher, then slightly adjust the bass level until the audio level peak remains at -3 decibels. In order to ensure that the sound of the microphone is not distorted, most professionals will set the absolute peak of their device at -3 decibels.
4. Storage and Maintenance of Lavalier Microphone
(1) Do not wrap the collar clip too tightly: bending or wrapping the connecting wires of the collar clip too tightly can cause unnecessary pressure damage to the precision coil and interface. The correct wrapping method for the collar clip microphone is to loosely wrap the connecting wire into several turns without adding additional pressure.
(2) Prepare a dedicated storage box for the collar clip microphone: Properly place the collar clip microphone wrapped in several circles in the dedicated storage box. If there are other microphone accessories or tools in your storage box, it is recommended to first pack the collar microphone in a bag, and then place it separately in a dedicated compartment of the storage box.
5. A must-have for using a lavalier microphone
When using a lavalier microphone, it is recommended to equip it with at least the following small items:
(1) Additional Windproof Cotton: Windproof cotton is extremely easy to lose, and once it is missing, the effect of outdoor recording will be greatly reduced. Therefore, it is best to prepare two more windproof cotton.
(2) Additional collar clip clips: Collar clip clips are often easily lost or damaged, so it is important to have two extra clips in case of emergency.
(3) Enough backup batteries: Be prepared for the rainy day, and batteries are also a must-have.
(4) Enough tape: Remember to wear 1-2 medical tapes to secure the collar clip on the skin surface, as well as wire or prop tapes to secure the collar clip on clothing.
- Tel: +86-755-28169429
- Mob2: +8618124114055
- Email: 779480230@qq.com
 Wechat: 18124114055
whats:+8618926474066
Facebook:Sensaura4066@gmail.com
 QQ: 779480230
- Add: 3rd Floor, Building C, Dongxinjia Industrial Park, No.15 Zhengxiang Road, Guangming New District, Shenzhen.
What are the tips for using the lavalier microphone
Aug 03, 2023 Leave a message
Send Inquiry