


Hey there! As a microphone supplier, I often get asked about setting up mics for small venues. Whether it's a cozy coffee shop open mic night, a small community hall for a local event, or a compact conference room, getting the microphone setup right can make all the difference. In this blog, I'll walk you through the steps to set up a microphone for a small venue, and I'll also share some of our top - notch products, like the World's First NearLink Wireless Headset.
Step 1: Understand Your Venue
The first thing you need to do is take a good look at the small venue. Check its size, shape, and the type of acoustics it has. A square - shaped room might have different sound reflections compared to a rectangular one. Also, note if there are any hard surfaces like concrete walls or glass windows that can cause echo. For example, if the venue has a lot of hard surfaces, you might need to use some acoustic panels to reduce the echo.
Step 2: Choose the Right Microphone
There are different types of microphones, and each is suitable for different situations.
Dynamic Microphones
These are tough and can handle high sound pressure levels. They're great for live performances, especially if you have loud instruments or singers who like to belt it out. Dynamic mics are less sensitive to background noise, so they're perfect for small venues where there might be some ambient noise.
Condenser Microphones
Condenser mics are more sensitive and can pick up finer details in sound. They're ideal for spoken - word events like lectures or poetry readings. However, they're also more prone to picking up background noise, so you'll need to make sure the venue is relatively quiet.
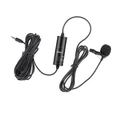
Wireless Microphones
Wireless mics offer a lot of flexibility. The performer can move around the stage freely without being tethered to a cable. Our World's First NearLink Wireless Headset is a game - changer in this regard. It provides a stable wireless connection and high - quality sound, allowing the user to move around the small venue without any signal drop - outs.


Step 3: Positioning the Microphone
Once you've chosen the right microphone, it's time to position it correctly.
On a Stand
If you're using a stand - mounted microphone, place it at the right height. For singers, the microphone should be at mouth level, about 2 - 3 inches away from the lips. This helps to capture the sound clearly without any popping or distortion. For speakers, you can adjust the height according to their comfort.
In a Choir or Group Setting
If you have a choir or a group of speakers, you might need multiple microphones. Space them out evenly to ensure that everyone's voice is picked up. You can also use a microphone array for a more uniform sound capture.
Step 4: Connecting the Microphone
Now, let's talk about connecting the microphone to the sound system.
Wired Microphones
For wired mics, you'll need to connect them to a mixer or an audio interface. Make sure the cables are in good condition and are properly plugged in. Check the input channels on the mixer and set the gain levels correctly. You don't want the sound to be too low or too high.
Wireless Microphones
Wireless mics usually come with a receiver that needs to be connected to the sound system. Follow the manufacturer's instructions to pair the microphone with the receiver. Make sure the receiver is placed in a location where it can receive a strong signal from the microphone.
Step 5: Sound Testing and Adjustment
After connecting the microphone, it's time for some sound testing.
Initial Check
Have someone speak or sing into the microphone at a normal volume. Listen for any strange noises, feedback, or distortion. If you hear feedback, which is that high - pitched screeching sound, it could be due to the microphone being too close to the speakers or the gain levels being set too high.
Volume and Tone Adjustment
Use the mixer to adjust the volume, bass, treble, and other sound parameters. You want to achieve a balanced sound that sounds good throughout the small venue. Walk around the venue while the sound is being tested to make sure the sound is evenly distributed.
Step 6: Consider Backup Equipment
In a small venue setup, it's always a good idea to have some backup equipment.
Backup Microphones
Bring an extra microphone in case the primary one fails. This can save your event from going silent in the middle.
Backup Cables
Have some spare cables on hand. A cable can get damaged easily, and having a backup can prevent any interruptions.
Step 7: Maintenance and Care
Once the event is over, take good care of your microphones.
Cleaning
Clean the microphone regularly. Use a soft, dry cloth to wipe the microphone head. For more stubborn dirt, you can use a mild cleaning solution, but make sure to follow the manufacturer's instructions.
Storage
Store the microphones in a cool, dry place. If possible, use a microphone case to protect them from dust and damage.
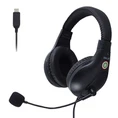
Our Microphone Range
As a microphone supplier, we offer a wide range of microphones suitable for small venues. Our World's First NearLink Wireless Headset is just one of our top - selling products. We also have dynamic mics that are built to last and condenser mics that capture the most delicate sounds.
Contact Us for Purchase and Consultation
If you're in the market for a new microphone setup for your small venue, we'd love to hear from you. Whether you need help choosing the right microphone, setting it up, or just have some questions, our team of experts is here to assist you. Reach out to us, and let's start a conversation about how we can enhance the sound quality of your small - venue events.
References
- Microphone Basics: A Guide for Beginners. Audio Technology Magazine.
- Best Practices for Sound Setup in Small Venues. Live Event Journal.